Tips and Tricks for Landscape Photography to Take Better Photos Today! – Photographer Marc Silber
Let’s discuss landscape photography. This is personal to me because I started as a landscape photographer. It was my first genre. Although I do a lot of environmental portraits, landscapes have a special place in my heart. So, I can tell you this for a fact: it’s a tool you’re always going to want to know about. The tips I am going to share with you are from my two books Advancing your Photography and The Secrets to Creating Amazing Photos Composition.
By the way, these two books have some amazing ideas to transform your photography. You can get them at a huge discount just by clicking here.
You can watch Marc’s Youtube Video on this subject below.
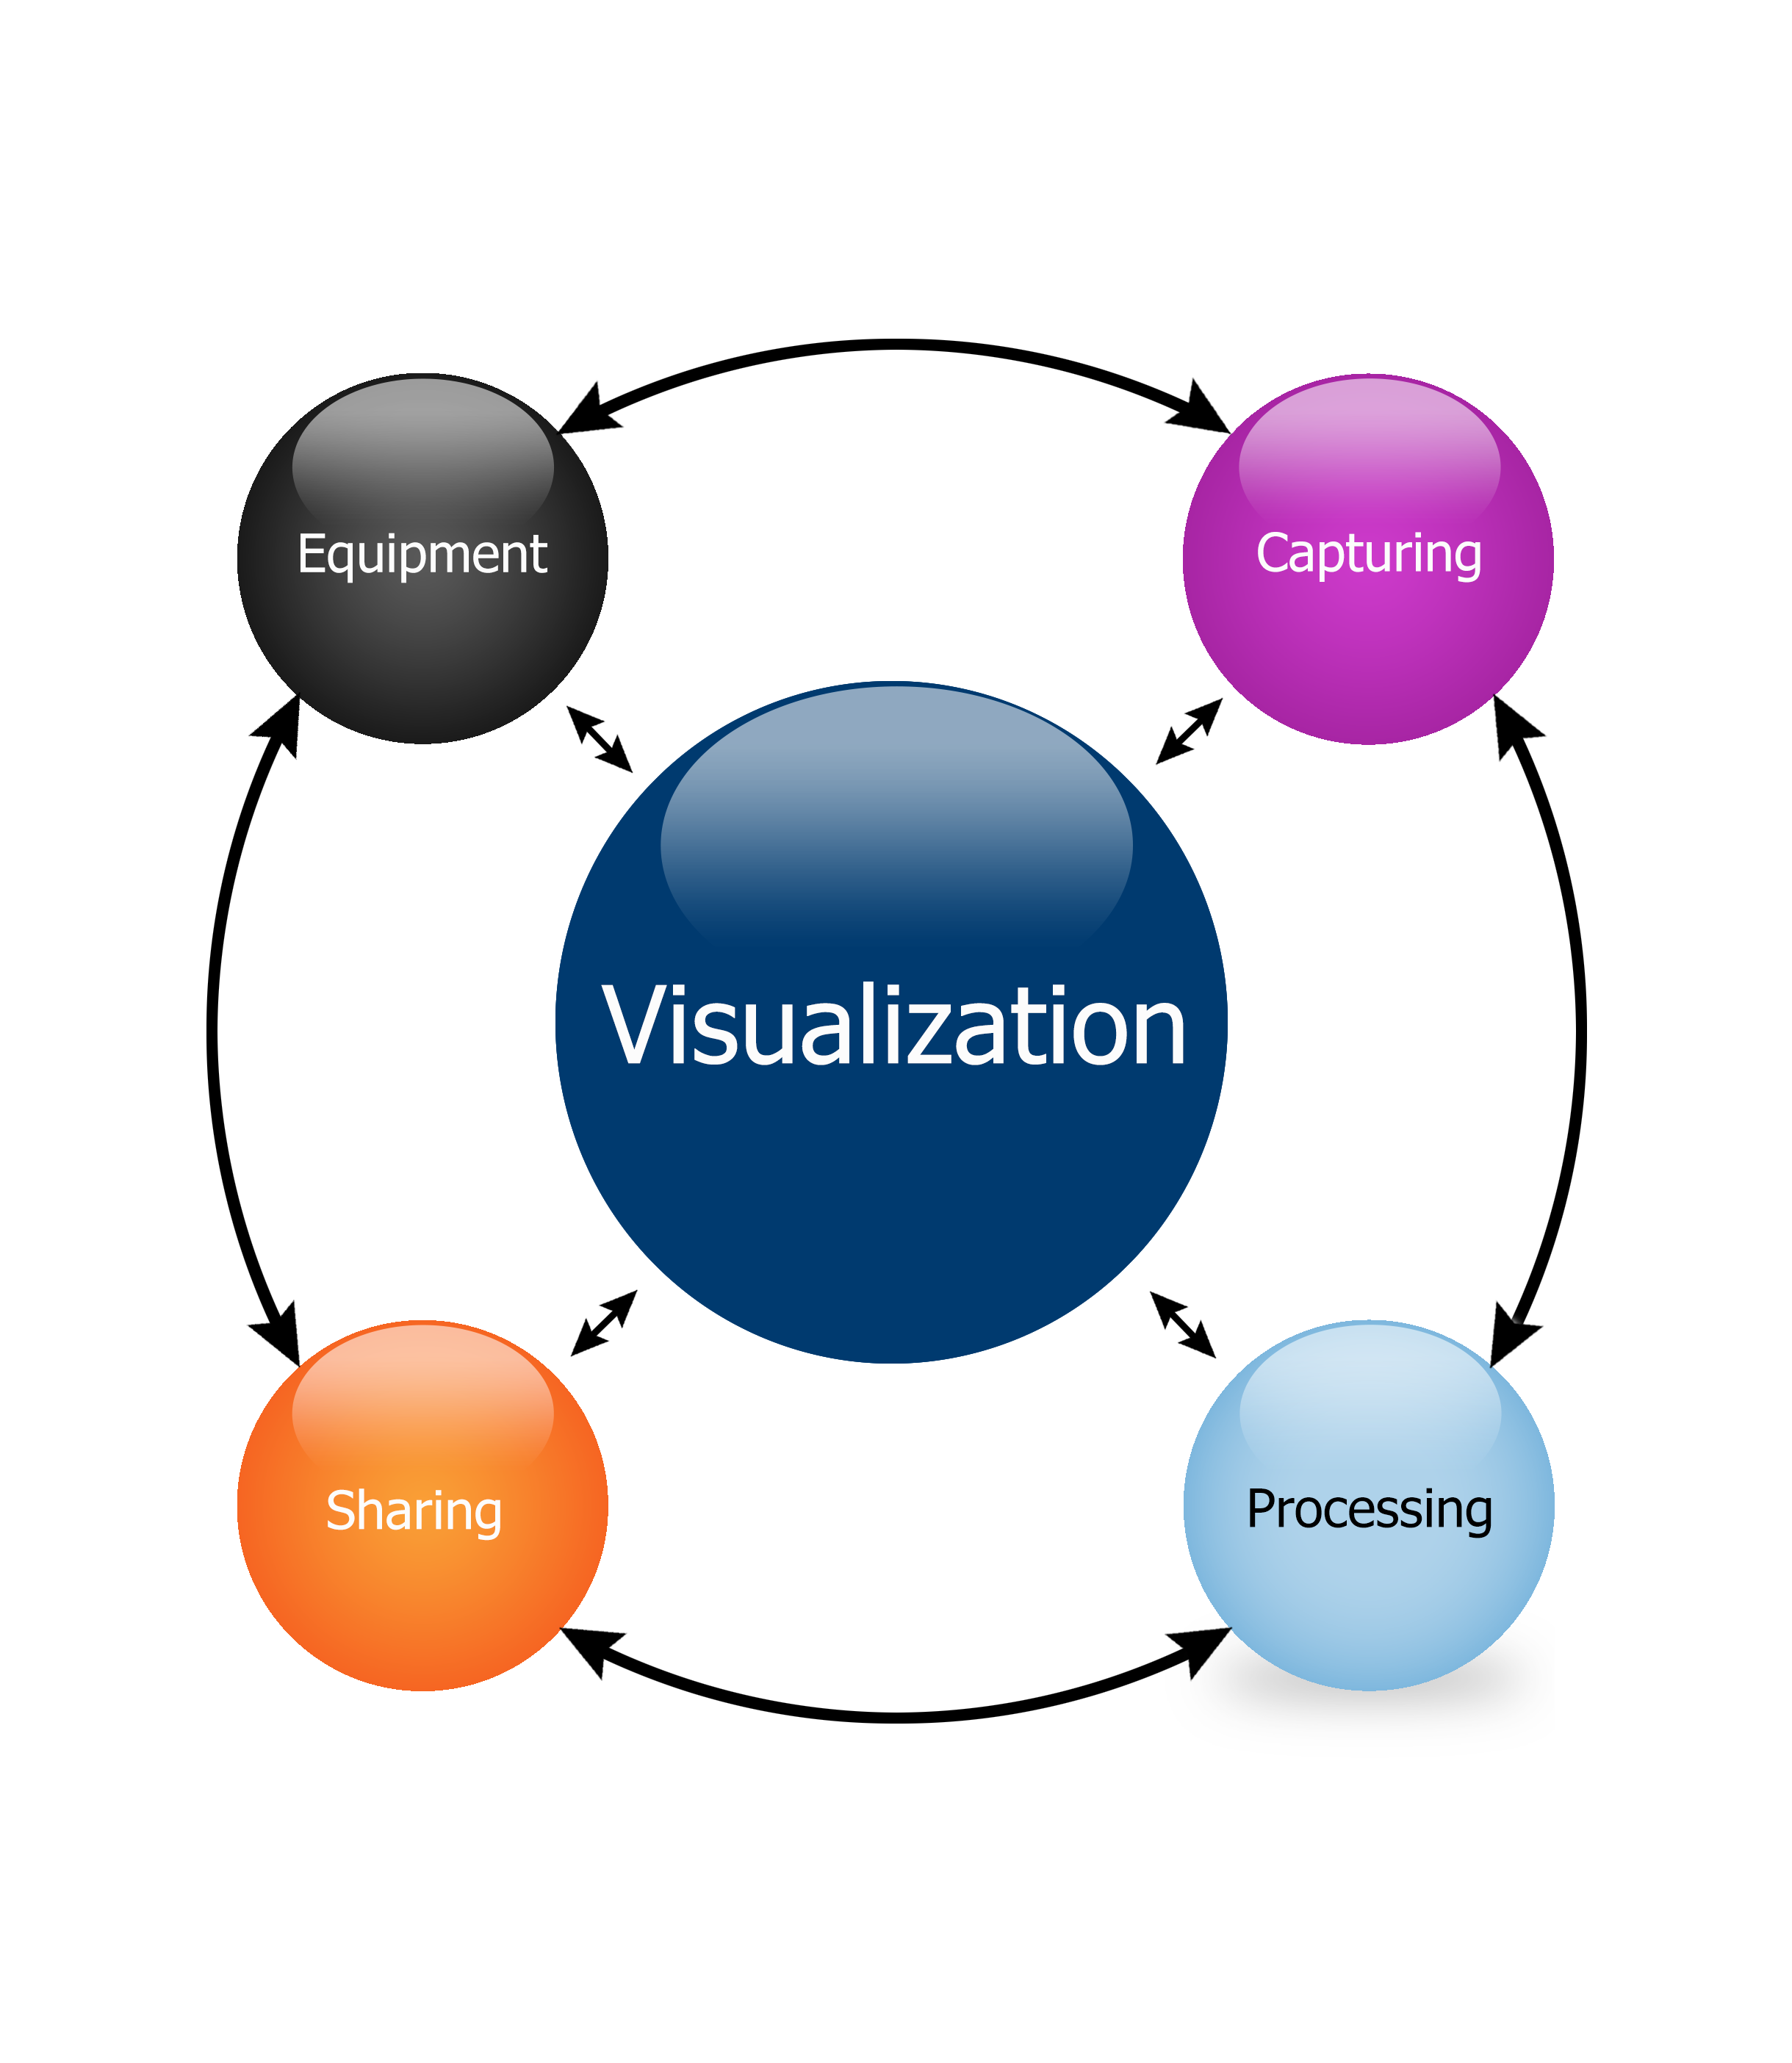
The Starting Point – Visualization
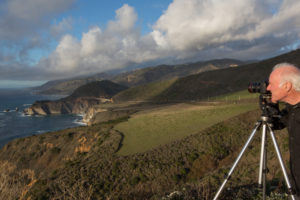
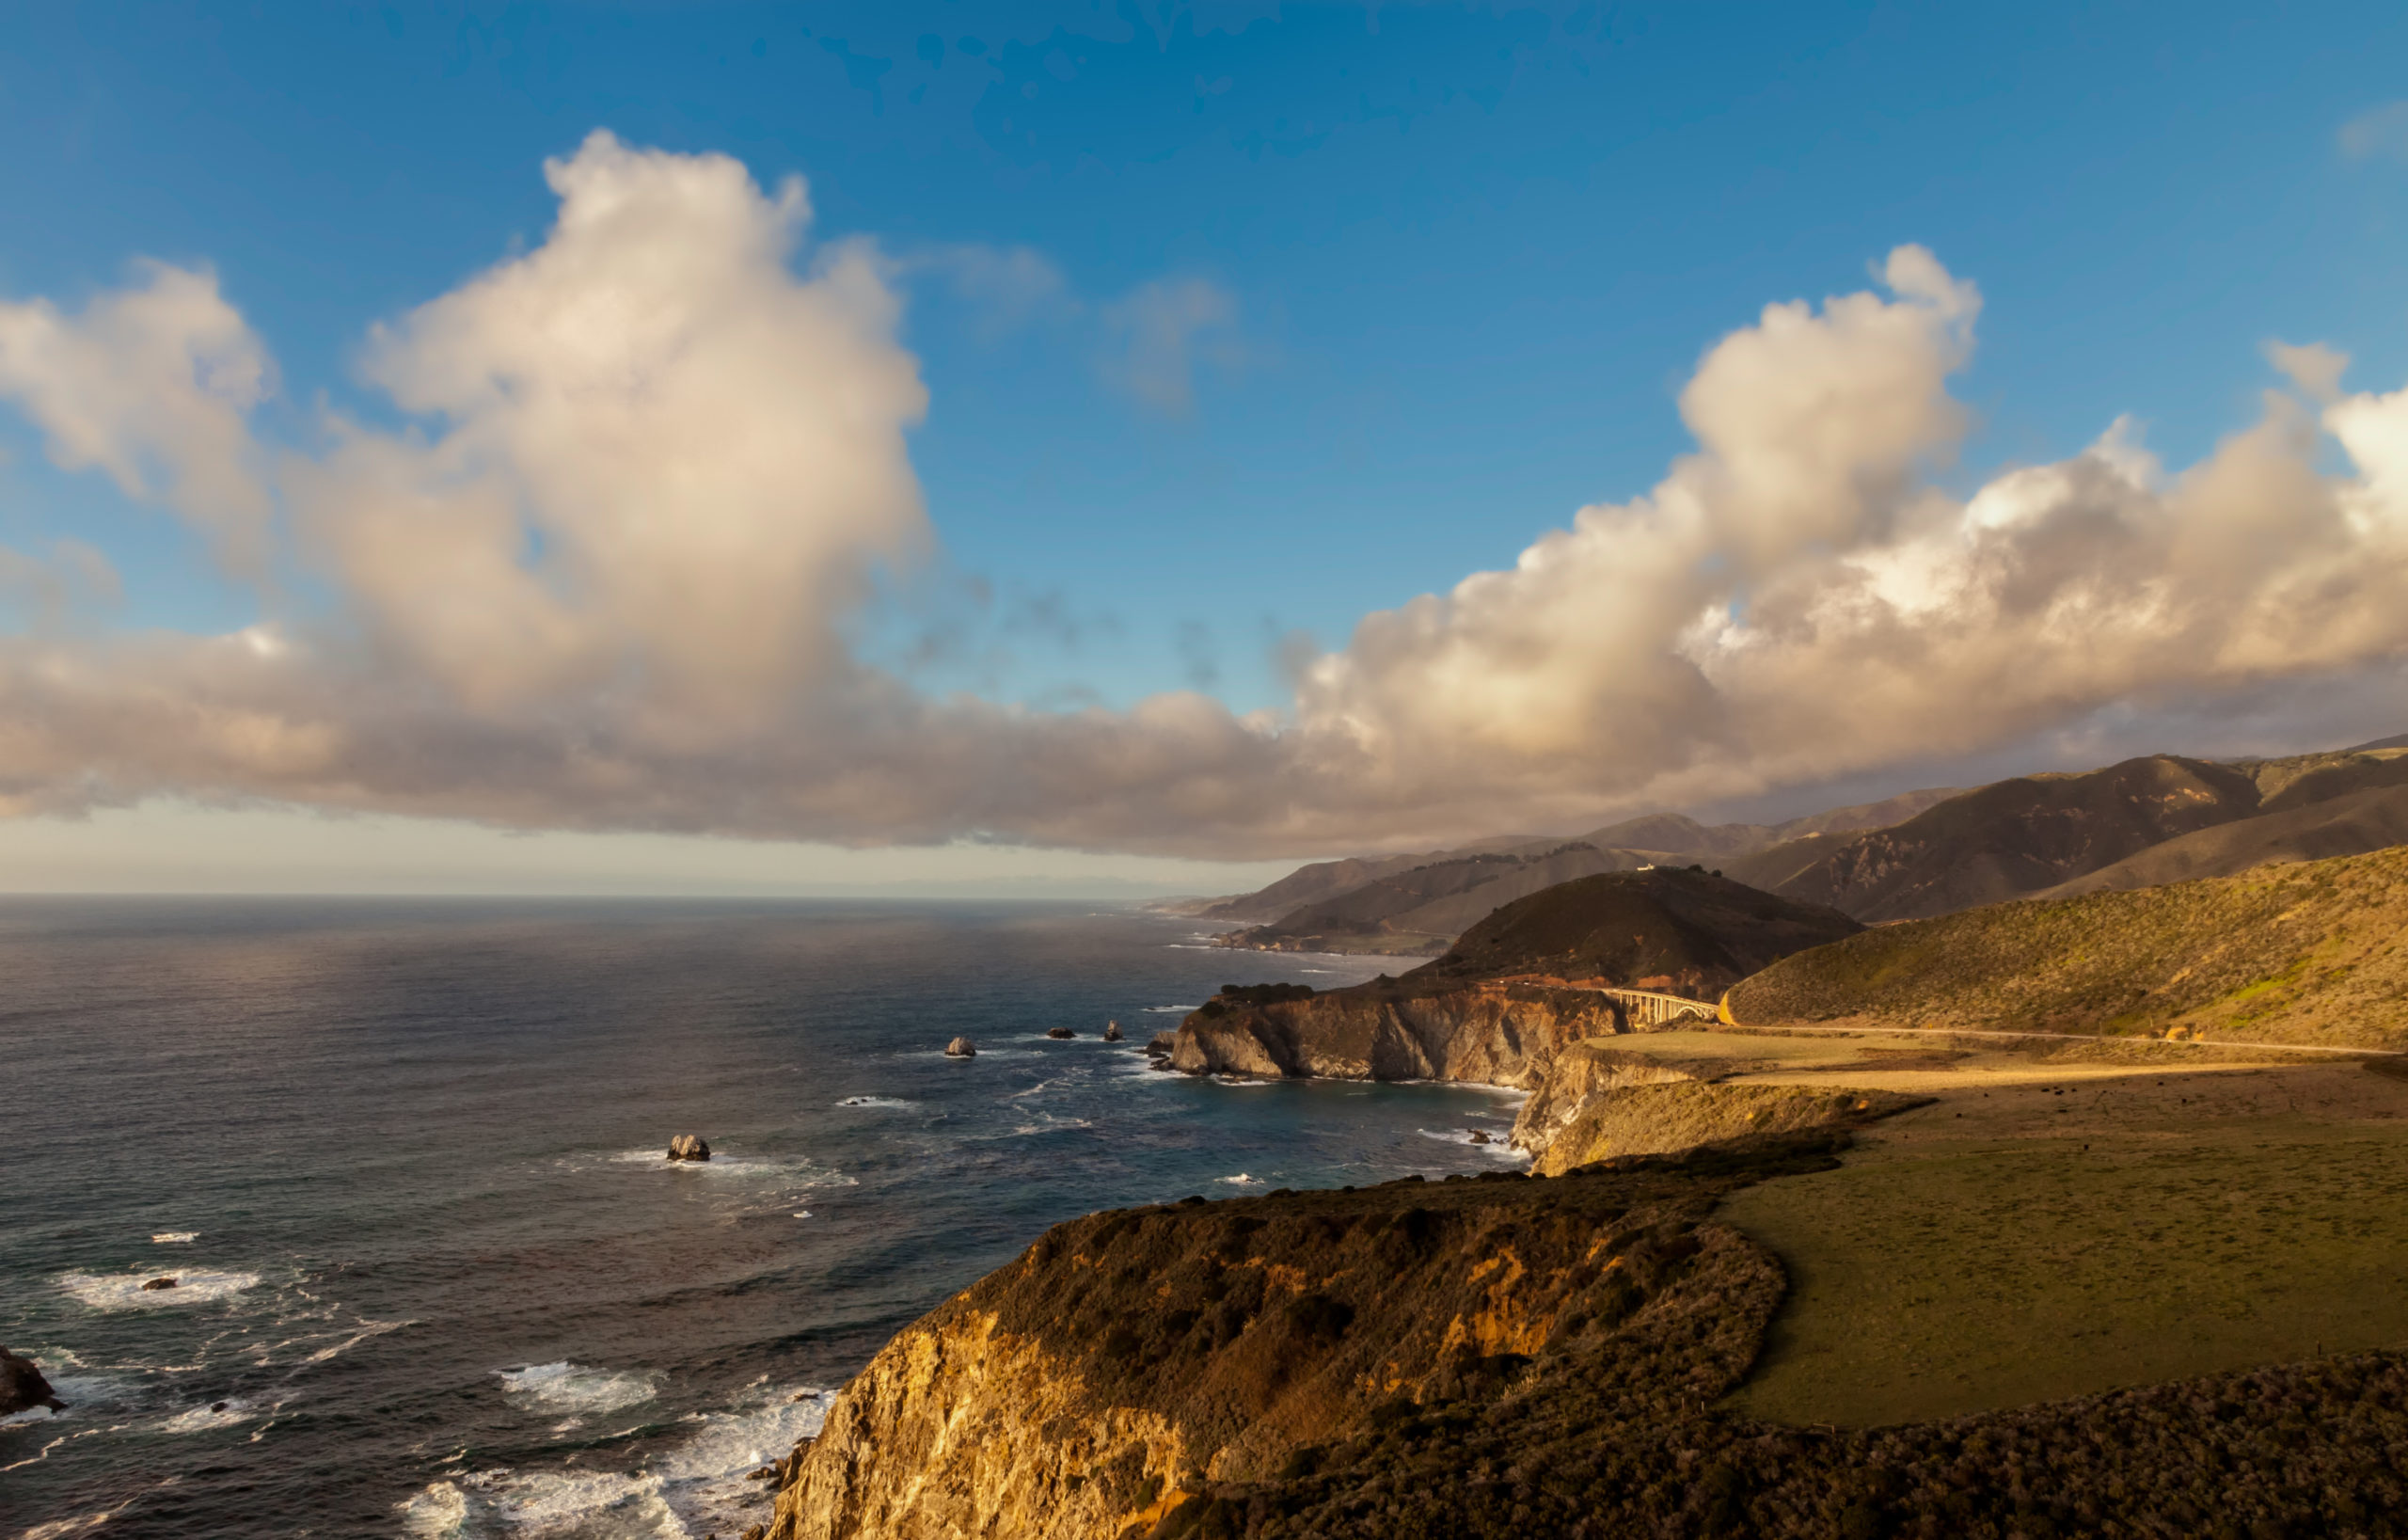
The first thing, as I will always say, is visualization. Visualization is the power of forming a mental picture or vision of something not actually present to the sight. It turns out the photography starts with you, not with your camera. It starts with you getting a vision of what you want to photograph. Here is a visual of me visualizing a photograph on our rugged coastline called Big Sur, California. I don’t have a camera in my hand, but I was visualizing what I wanted the photograph to look like. Then having done that I said, well I don’t want to be that close. I want to go way farther back; I want clouds and I want to capture the bridge in the next image.
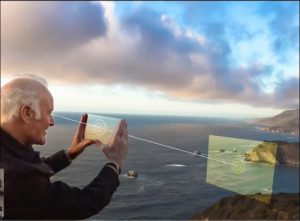 Marc Visualizing
Landscape Image Marc took capturing Bixby Creek Bridge
In the above case, I was using a tripod. They are actually really handy when you’re shooting landscapes. In terms of landscapes, tripods make you slow down. Most of the time when you’re shooting, it isn’t like a split-second thing. You’ve got a little time on your hands and the tripod adds that element of carefully looking and slowing down. Also, in the old days of big cameras, we always used tripods and you can emulate that. Also, you may want to put yourself in the frame using a self-timer to capture while you walk into the frame. In which case, you also need a tripod. So, always take your tripod with you.
Visualizing with the aid of a tripod
Developing Your Visual Library
A lot of people ask me how they can develop their visual library. Well, one of the best ways is to look at art. They give valuable insights. You can go to Museums physically when they open up or you can go to online galleries. You can also get great insight from books. Study the art you see in these sources, don’t just take a glance. When you find the artists that resonate with you the most, study how they did it. You will learn a lot.
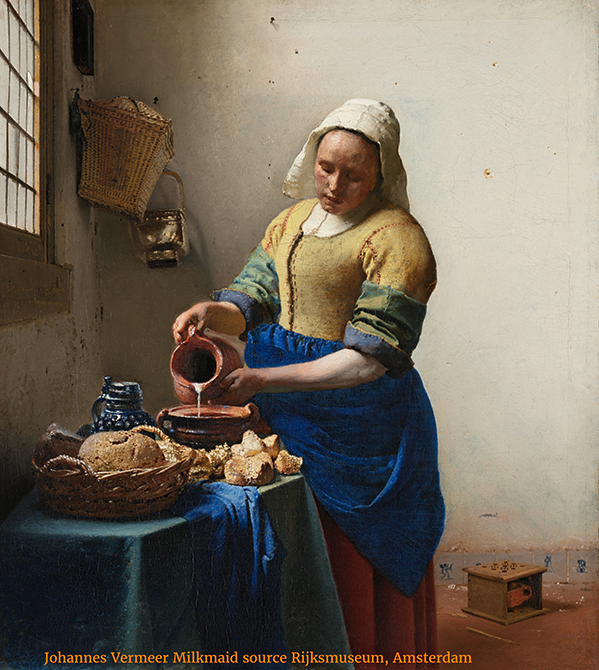
Take for example the image below you find in Rijksmuseum in Amsterdam. This is the amazing work of our friend Rembrandt. Look at the use of the clouds, the lighting, and l how he placed the stone bridge. This is called a balanced composition. You can emulate this with your photographs: you can get those dark moody skies and you can look for the lighting that is striking your center subject. There’s a lot to learn from these artists. By the way, there are many great works from different artists in Rijksmuseum and the museum allows you to download high-resolution prints.
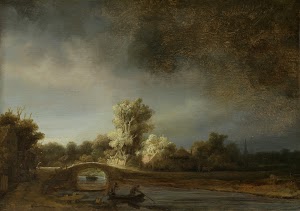
Landscape with a Stone Bridge, Rembrandt
Train Your Eye to See Images
Images don’t just jump out at you. You have to use a framing device to train your eye to see photographs. This is a very very important skill that you can develop and continue to use. Just like when you are playing any sport; basketball, tennis, golf, surfing, or whatever. You do a lot of practice many times. You have to do the same thing with your eye. Train your eye to find images because they will never jump out at you and wave big flags and say hey come on mark press the shutter.

Using two fingers as a framing device
Composition and Landscape Photography
When we talk about composition we are referring to capture. Once again, it’s important to note that framing is a basic tool you need here. In fact, you are going to use it over and over again as it gives you layers, compass, and gives contrast. It leads the person’s eye to where you want it to go. In the landscape photograph below, you can see a frame built from the fence and the edge of the tree. This gives a foreground layer and adds contrast and depth.
One basic thing to know is that we’re trying to make our photographs which ordinarily are two-dimensional appear three-dimensional. With the frame in the foreground, we can then look into the background. Framing is the key tool we use to make this happen. There are a lot of frames out there such as natural frames (trees, rocks, etc) and artificial frames (such as buildings, bridges, fences, etc. You have to look for them.
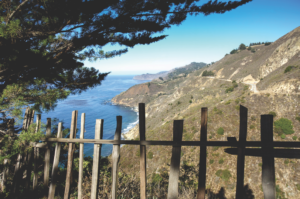
Landscape photograph of Big Sur using a fence, and tree as the frame
Another compositional tool that has great use in landscape photography is called group shape composition. Here is what the tremendously talented photographer Camille Seaman said:
“Think of everything as shapes. You’re arranging shapes in such a way to interact and to activate space, to push things forward and pull things back, to draw your eye here or guide your eye there. When you understand that, and you do it in that way; composition becomes like a ballet, it really becomes choreography.”
The Beauty of Group Shape Composition In Landscape Photography
What she’s saying is that you have to look at the shapes and move around until those shapes come together. This is important because you may have to move around. Your landscape isn’t going to move for you. It’s not like a person where you can say “hey, would you mind moving over next to that tree.” You can do that with people, landscapes.
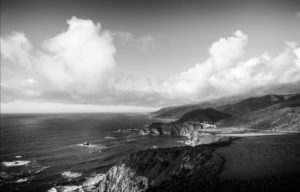
Here is a photograph I took in Hermanas Bay, South Africa. You can see a lot of shapes here. You have the clouds and that’s a whole set of shapes right there. Then we have the mountains on the left; another set of shapes. We have the mountains on the right; another set of shapes. Putting all these together, we get a group shape composition. I moved into where I framed it the way I wanted it. I had to move around a little bit because I wanted to get that sunset. The sunset is pretty amazing there as it adds depth and dimension. Always look for how you can group those different compositional elements together.
Landscape photo Marc took in Hermanas Bay, South Africa
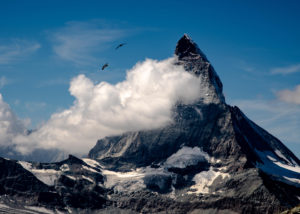
Another group-shaped composition with the added bonus of clouds is the Matterhorn and the birds. The birds form what we call a punctuation point. A punctuation point gives you exactly what a punctuation point does in writing. It just helps highlight what your image is about. In this case, these two birds soaring really added to the image for me and I waited for them.
I try to use birds a lot in landscapes or people or animals or even a car. I want some other element in there besides just the mountain. Now imagine this photograph with no clouds, blue sky, and just the mountain. It may be okay, right? But it would look like a postcard. If you wanted a postcard why not just buy a postcard? But if you want your own stamp on it; or you want to put your thumbprint on your photograph then you look for these other elements.
Join the AYP Club!


Leave A Comment
You must be logged in to post a comment.