How do you process images to achieve deep and stunning black and white photographs? I recently interviewed Dotan Saguy, a very talented street and documentary photographer about his photography. During the interview, he gave us a demonstration using Silver Efex Pro from the NIK Software Collection made by DxO labs. I’ve been using their collection for years and recommended it for black and white processing in my book Advancing Your Photography. He gave us his workflow along with his tips and advice:
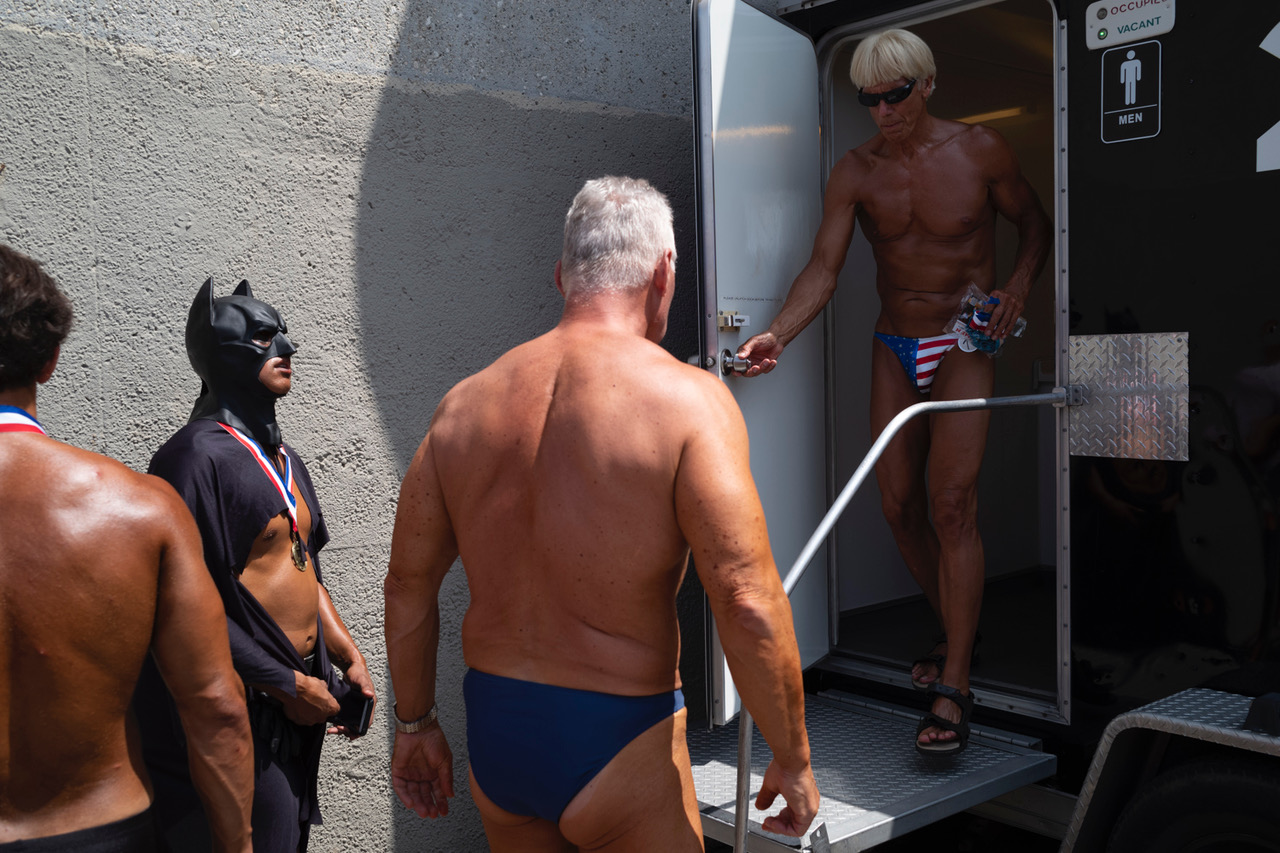
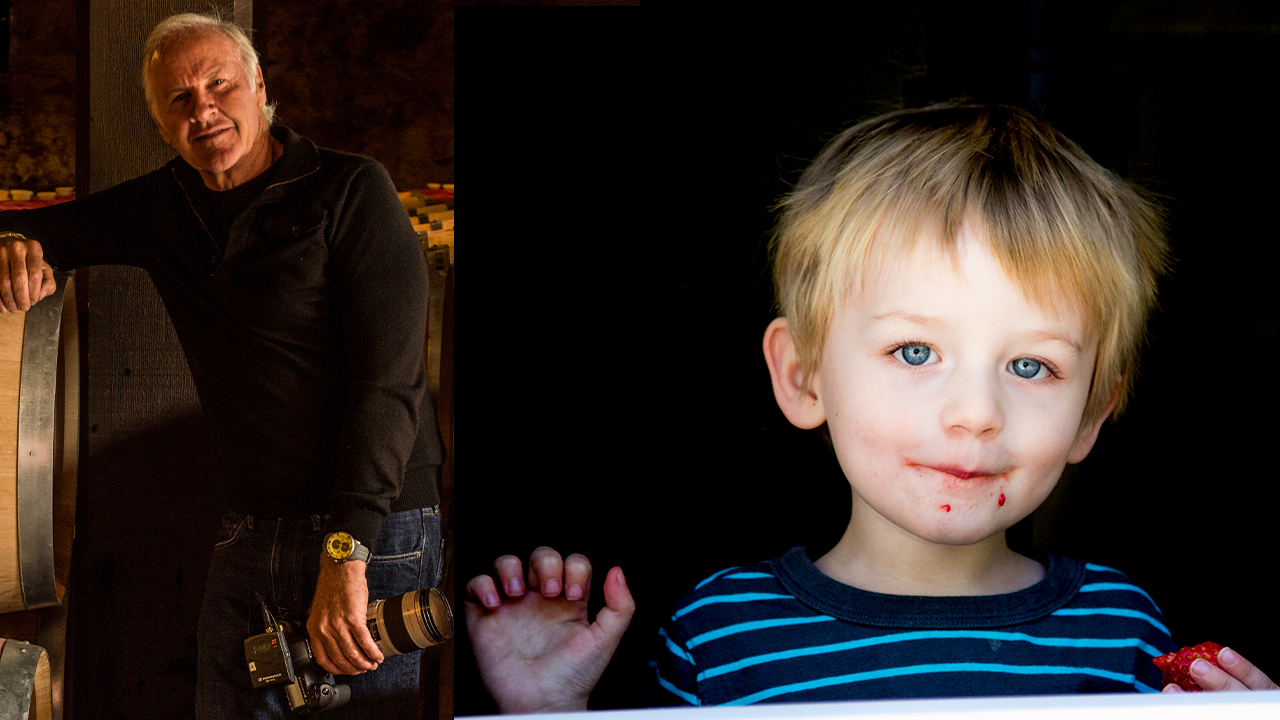
Image Before Black and White Processing. Image by Dotan Saguy.
Editing Steps
- Look at the exposure of the image in Lightroom using the histogram to make sure nothing is under or over exposed that needs correction.
- With black and white images he often underexposes to preserve details and corrects this in Lightroom.
- Right click in Lightroom then click on “Edit in,” this brings up a dialog.
- Choose to edit as a Tiff file so that you can make changes to it later.
- It now opens in Silver Efex Pro.
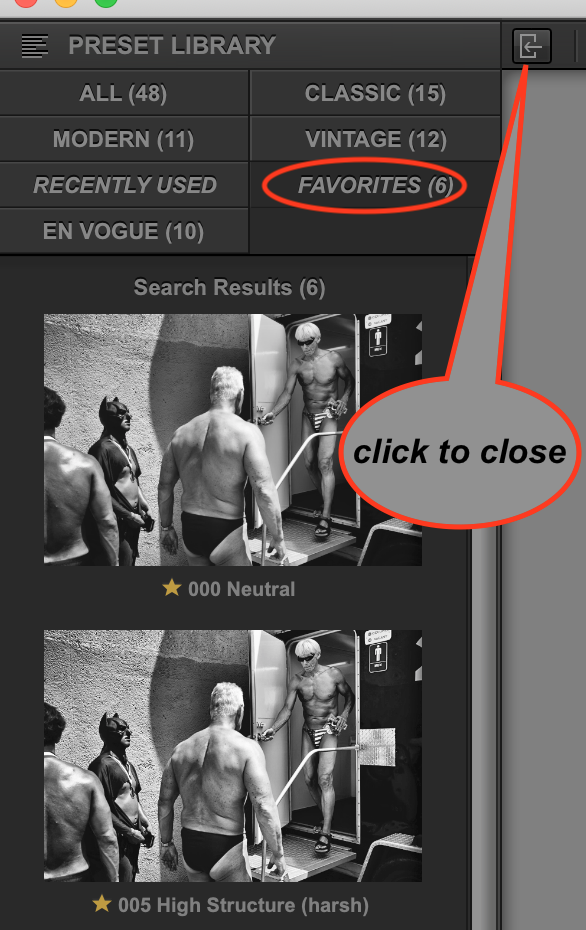
- On the left side, pre-visualize your image by choosing a preset to use as a starting point. You can pick your favorites from their Preset Library of 48. Having your favorites saved makes it easy to press the down arrow through each and find the one that you feel is the best fit for your image.
- Now that you have chosen your preset as a base, you can close the preset pane by clicking on the rectangle with a left arrow at the top (see screen shot). This allows you to regain the full “real estate” of the screen.
- Now you’ll be working in the right side panels, starting with the Global Adjustments selection. Dotan suggests that you click the arrows down to the left of each section (Brightness, Contrast, Structure) so that you see all the controls.
- He often recommends turning off Tonality Protection by sliding shadows and highlights to the left. This helps create a high contrast image. He wants a full range from pure black to pure white and has found that leaving this on can prevent this in some images. He also wants to see the changes he is making and not have them be protected.
- Look at the different parts of the image: Determine what you what to say with it and if anything gets in the way of your story telling. You can now adjust the other siders to suit your vision of the image. A note about Soft Contrast, which is a very powerful adjustment: By moving it all the way to the left and right you can see the results can get pretty drastic so make careful and subtitle adjustments with it.
- Click on Selective Adjustments to add control points to create local adjustments to support your vision of the image. For example, you may want to bring down the brightness in a part of the image that would pull the viewer’s eye away from what you want them to see.
- Place the control point on the area you want to adjust and then adjust the size of the area by clicking the top “bullseye” and adjusting the slider to make it larger or smaller to adjust that exact area
- Now adjust any of the individual sliders in the Control Point: Brightness, Contrast, Structure (similar to Clarity = midtone contrast in Lr) Amplify Whites, Blacks, Fine Structure and Selective Colorization (adds color back to the point.
- Your viewer’s eyes are drawn to bright areas, if that’s not what you want, use a Selective Adjustment to reduce brightness
- Avoid bright spots on the edges of the image which are a “recipe for disaster” and pull the viewers eyes right out of the image. Use Selective Adjustments in the corners to reduce brightness.
- Tip: Once you have a Control Point set the way you want it, you can duplicate it by clicking on it while holding Option (Mac) or Alt (Windows) and moving the duplicate to the new location.
- Look for anything that might distract from the subject and adjust accordingly.
- Another tip: As you darken certain areas of the image you might find areas get darker that you didn’t intend. You can drop a control point on those points that you don’t want to be as dark, this by default is a “neutral control point,” which brings the brightness back to normal. You may need to adjust brightness further.
- If there is structure and detail in the image that is distracting, use your Control Points and reduce Structure.
- Keep fine-tuning your image to make it tell your story!
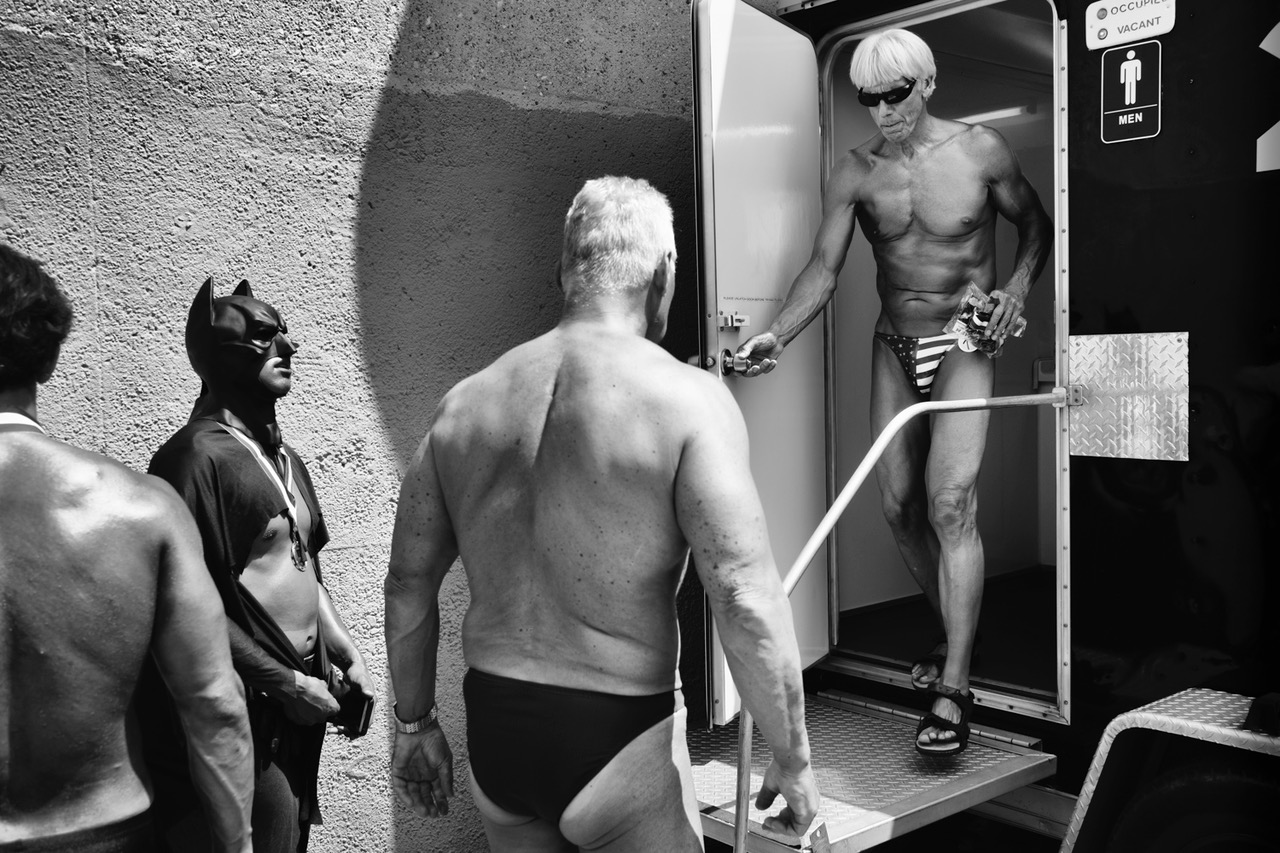
Image After Black and White Processing. Image by Dotan Saguy.
Check out our video to see Dotan’s full demonstration on his black and white editing. You can also learn more about Silver Efex Pro and the entire NIK collection made by DxO Labs and get a free 30 day trial here.
Learn More about Dotan Saguy:
Website
Dotan’s Books
Dotan’s Street Photography Course
Instagram
More videos with Dotan Saguy:
Full Interview with Dotan Saguy
Tips on Street Photography and Working with People
Join the AYP Club!
Find all our past podcasts here.
Leave A Comment
You must be logged in to post a comment.